Edit the program
Edit the program
As a program manager, you control how certificates are designed. For each program, you predefine how certificates will be generated.
Basic settings
The first part of the settings page are about the program name, issuer name etc. Based on the finish date, all programs in your list are sorted chronologically.
For each new seminar or workshop, it makes sense to add a new program. Programs can also be duplicated with one click.
Certificate text and color
The text on each certificate should not be too long. It usually contains basic information about the program and the participant's achievements.
If you want to get creative input, you can Ask AI. The Artificial Intelligence (in this case, OpenAI GPT 3.5) will replace the certificate text with a new one. It usually takes a few seconds. You can do this how many times you like.
You can use placeholders: This is helpful when you want to use the same text across several programs. All placeholders (title of certificate, program name, participant name, finish date) are populated dynamically when certificates are generated.
You can also use a background color of your choice or pick a color code (6-digit hex code with the hash, e.g. efbb00).
Add your LinkedIn Organization ID, also called "Company ID", so participants can link their LinkedIn resumé entries to your LinkedIn page.
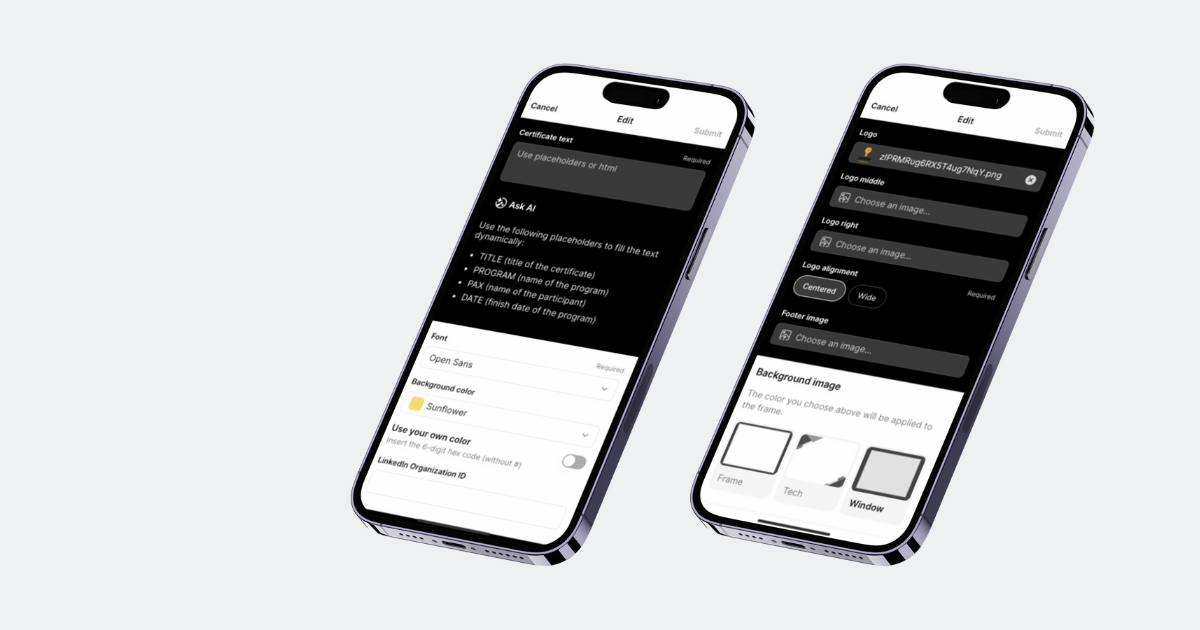
Logos, images and background
The color you picked above will be applied to your background. But the design or pattern of the background can also be changed (background image). Try it out!
If you're not sure which color to choose for the background, light-grey and silver often works.
You can upload your images (badges, company logo, federations etc.) into headers and footers of certificates.
Header images
Upload your own image here. It's recommended to use an image with a transparent background (as PNG file). If your image has a white background, your certificate should also have a white background: Otherwise you would see the white box around the image.
Also, sometimes it makes sense to crop the image before you upload it: Some images have empty space around a logo that's not really needed.
The image itself should have a high resolution, especially if you want to print certificates. As a rule of thumb, all images around 500x500 pixel or, even better, 700x700 pixel work just fine.
- When you upload 1 image in the first upload field, it will be shown in the top center.
- When you upload 2 or 3 images in the other upload fields, they can be shown either centred or wide (to the left and right).
Footer image
The footer image is always shown in the bottom center.
Contents
Basic settings
Certificate text and color
Logos, images and background
- Header images
- Footer image